Deploying a high-availability WordPress website with an external Amazon EC2
by Sharayu Javeer | on 24th April 2023 | in Architecture, AWS CloudFormation, AWS Organizations. This blog post was updated on April 24,2023.
Topics
Prerequisites
Launch a DB instance in Amazon RDS
Launch an EC2 instance
Connect to the server
Download Apache2 and MySQL
Configure and deploy your application
Install WordPress
Log in to your WordPress account
Clean up
Cloud Computing is now a widely spread domain, because of its security and the flexibility they provide. AWS is one of the platforms which not only gives security but also scalability. Let's explore my new project on AWS cloud and learn more about the resources.
Utilising an external Amazon EC2 to launch a high-availability WordPress website. WordPress may be installed using the AWS resource light sail by just starting an EC2 instance and downloading WordPress. However, we're going to deploy using the conventional strategy. We will first rent a virtual computer on the Amazon Web Services platform or a web server. Software that manages HTTP requests and assists in serving HTTP responses is known as a web server. As a result, the browser sends an HTTP request to the software's server whenever we try to view a website through it. Running the web server software on the server will handle our HTTP request, process it, and provide a suitable response.
1.Launch a DB instance in Amazon RDS
When you launch an instance with Amazon RDS, we need to follow these steps:-
In the following steps you'll use the Amazon RDS console to:
Launch a database with the MySQL engine.
Enable a Multi-AZ deployment. This creates a standby in a different Availability Zone (AZ) to provide data redundancy, eliminate I/O freezes, and minimize latency spikes during system backups.
To launch an RDS DB instance in a default VPC
Open the RDS console.
In the navigation pane, choose Databases.
Choose Create database.
Choose Standard Create.
Important
Do not choose Easy Create. If you choose it, you can't configure the necessary settings to launch this RDS DB.
Under Additional configuration, for the Initial database name, type
ebb.Review the default settings and adjust these settings according to your specific requirements. Pay attention to the following options:
DB instance class – Choose an instance size that has an appropriate amount of memory and CPU power for your workload.
Multi-AZ deployment – For high availability, set this to Create an Aurora Replica/Reader node in a different AZ.
Master username and Master password – The database username and password. Make a note of these settings because you will use them later.
Verify the default settings for the remaining options, and then choose Create Database.
After your DB instance is created, modify the security group attached to it to allow inbound traffic on the appropriate port
To modify the inbound rules on the security group that's attached to your RDS instance
Open the Amazon RDS console.
Choose Databases.
Choose the name of your DB instance to view its details.
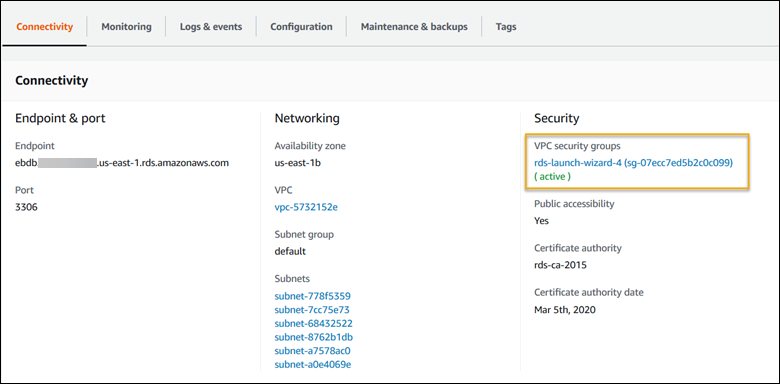
In the Connectivity section, make a note of the Subnets, Security groups, and Endpoints that are displayed on this page. This is so you can use this information later.
Under Security, you can see the security group that's associated with the DB instance. Open the link to view the security group in the Amazon EC2 console.
In the security group details, choose Inbound.
Choose Edit.
Choose to Add Rule.
For Type, choose the DB engine that your application uses.
For Source, type
sg-to view a list of available security groups. Choose the security group that's associated with the Auto Scaling group that's used with your Elastic Beanstalk environment. This is so that Amazon EC2 instances in the environment can have access to the database.Choose Save.
2.Launch an EC2 Instance
After clicking the Launch button, we need to select the Amazon Machine Image (AMI) which includes the operating system and applications required to launch an instance. Here we will select the Ubuntu Server 20.04 LTS as shown in the below snapshot.

The next step is to choose the type of instance we need. AWS provides many types of instances based on different use cases with various CPU combinations, memory, storage, and networking capacity. We will here select the t2.micro instance, which is a free tier eligible instance.
while writing this tutorial, Amazon provides 750 hours per month of free usage on the t2.micro instance. It makes it very affordable to run small/sample applications for an initial period.
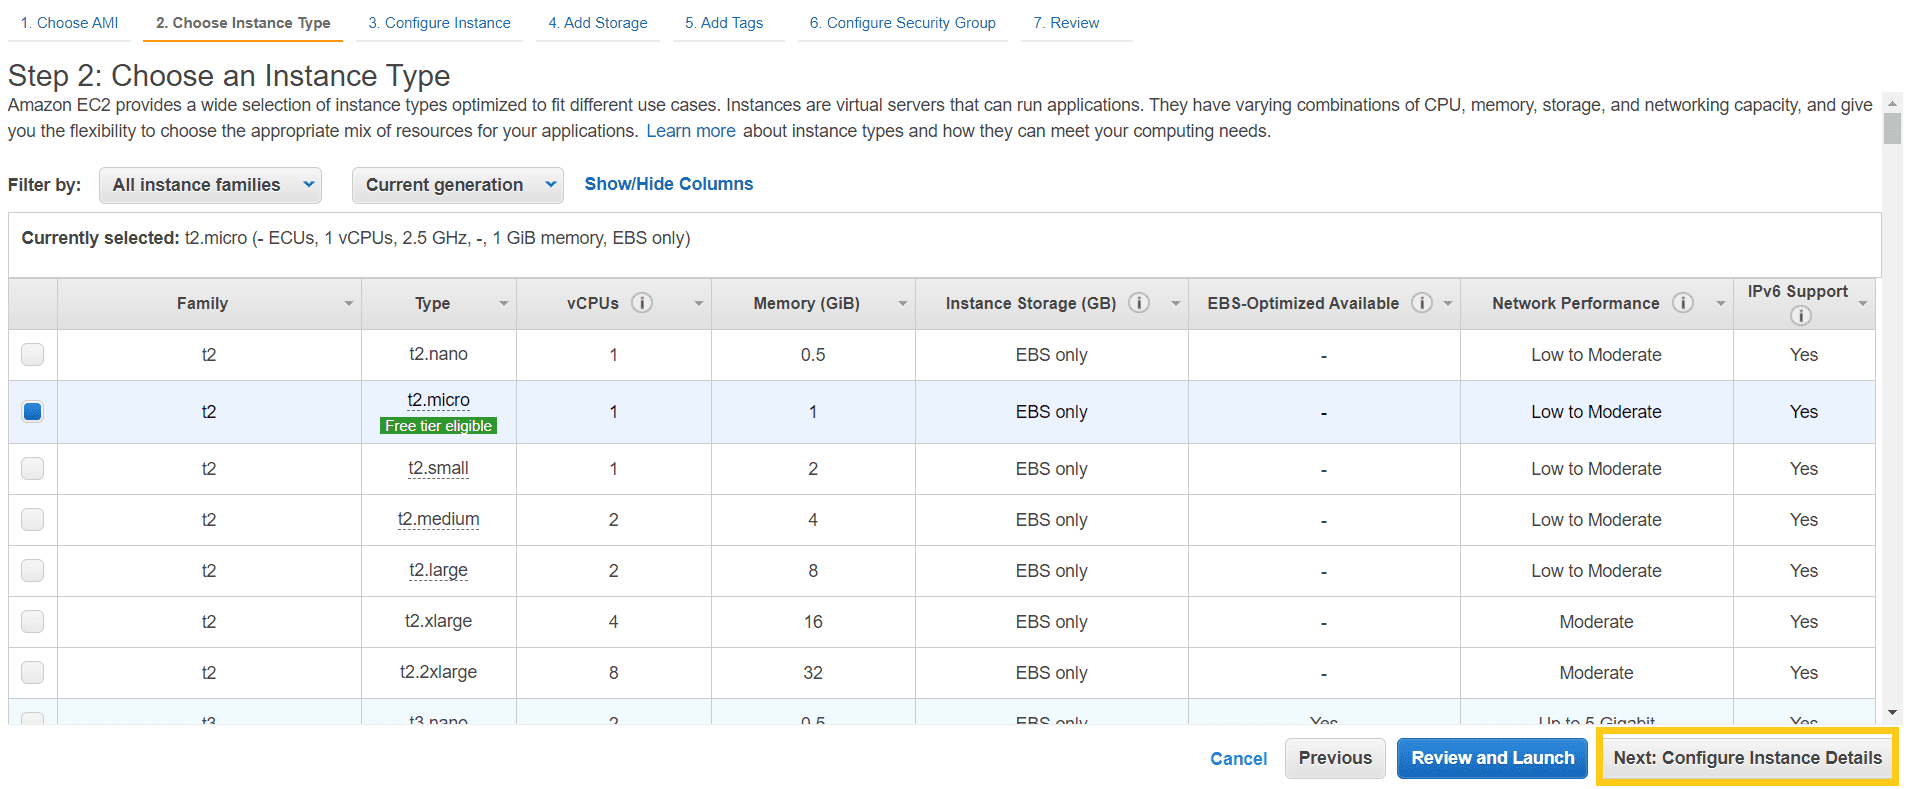
On the Instance Configuration Details Page, we have options to run more than one instance at once, and there are other configurations regarding roles and access management. We will skip all this and click on the Next: Add Storage button.

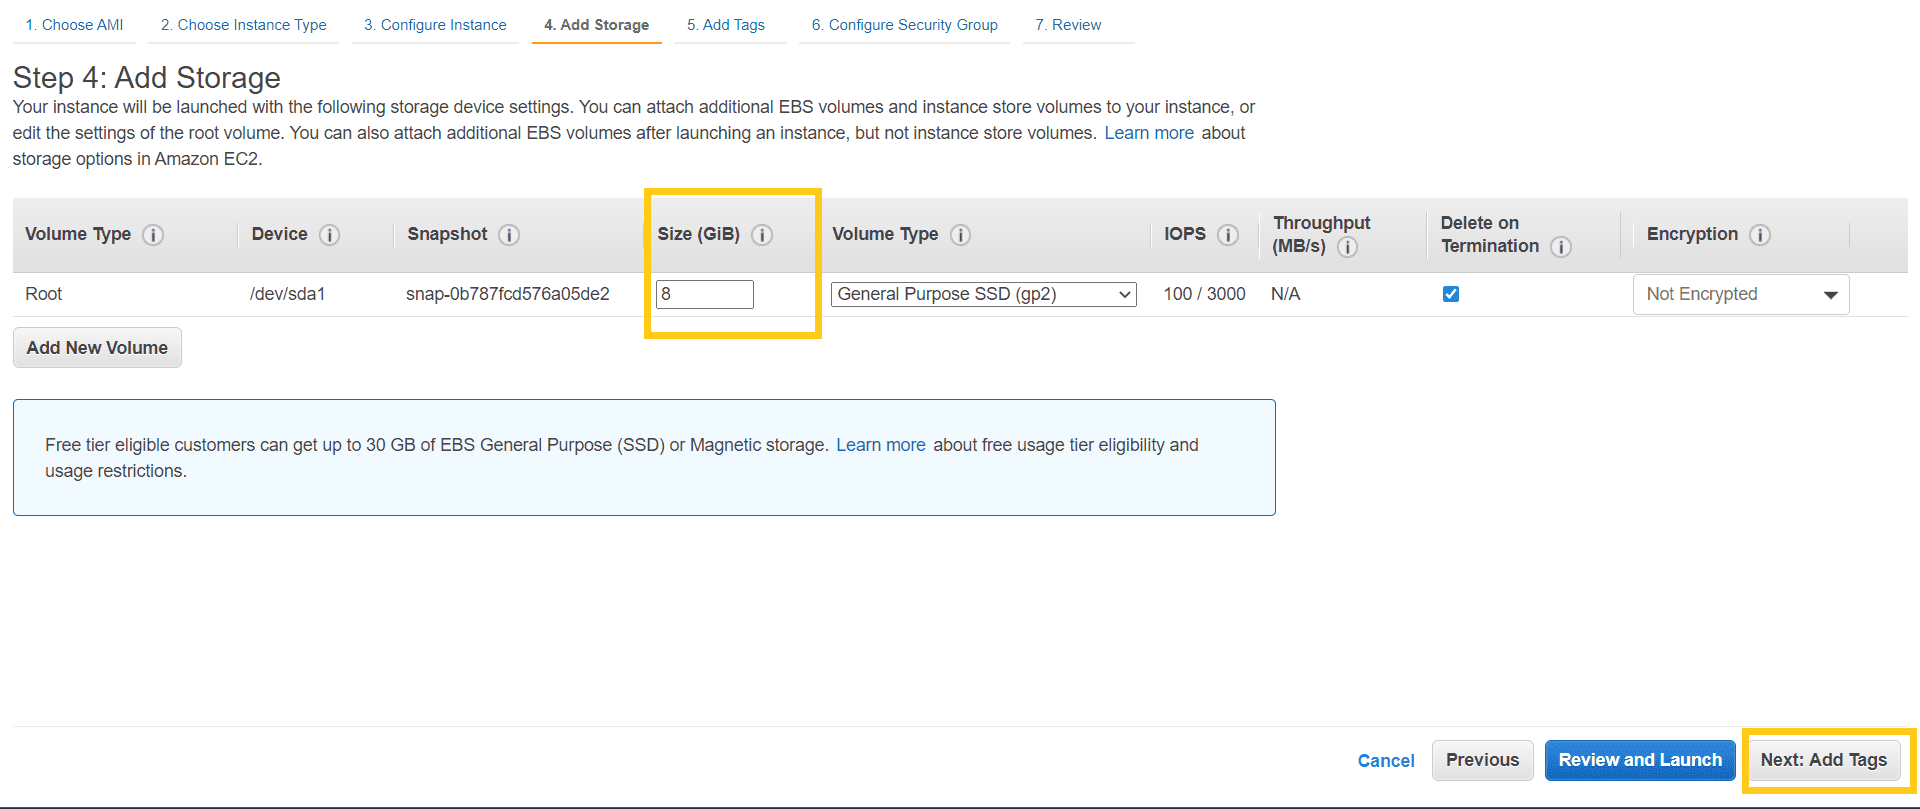
We can increase or decrease the size of instance storage while creating it; the free tier is eligible for up to 30GB; if you need more storage, it will be billed according to Elastic Block Store (EBS) Pricing
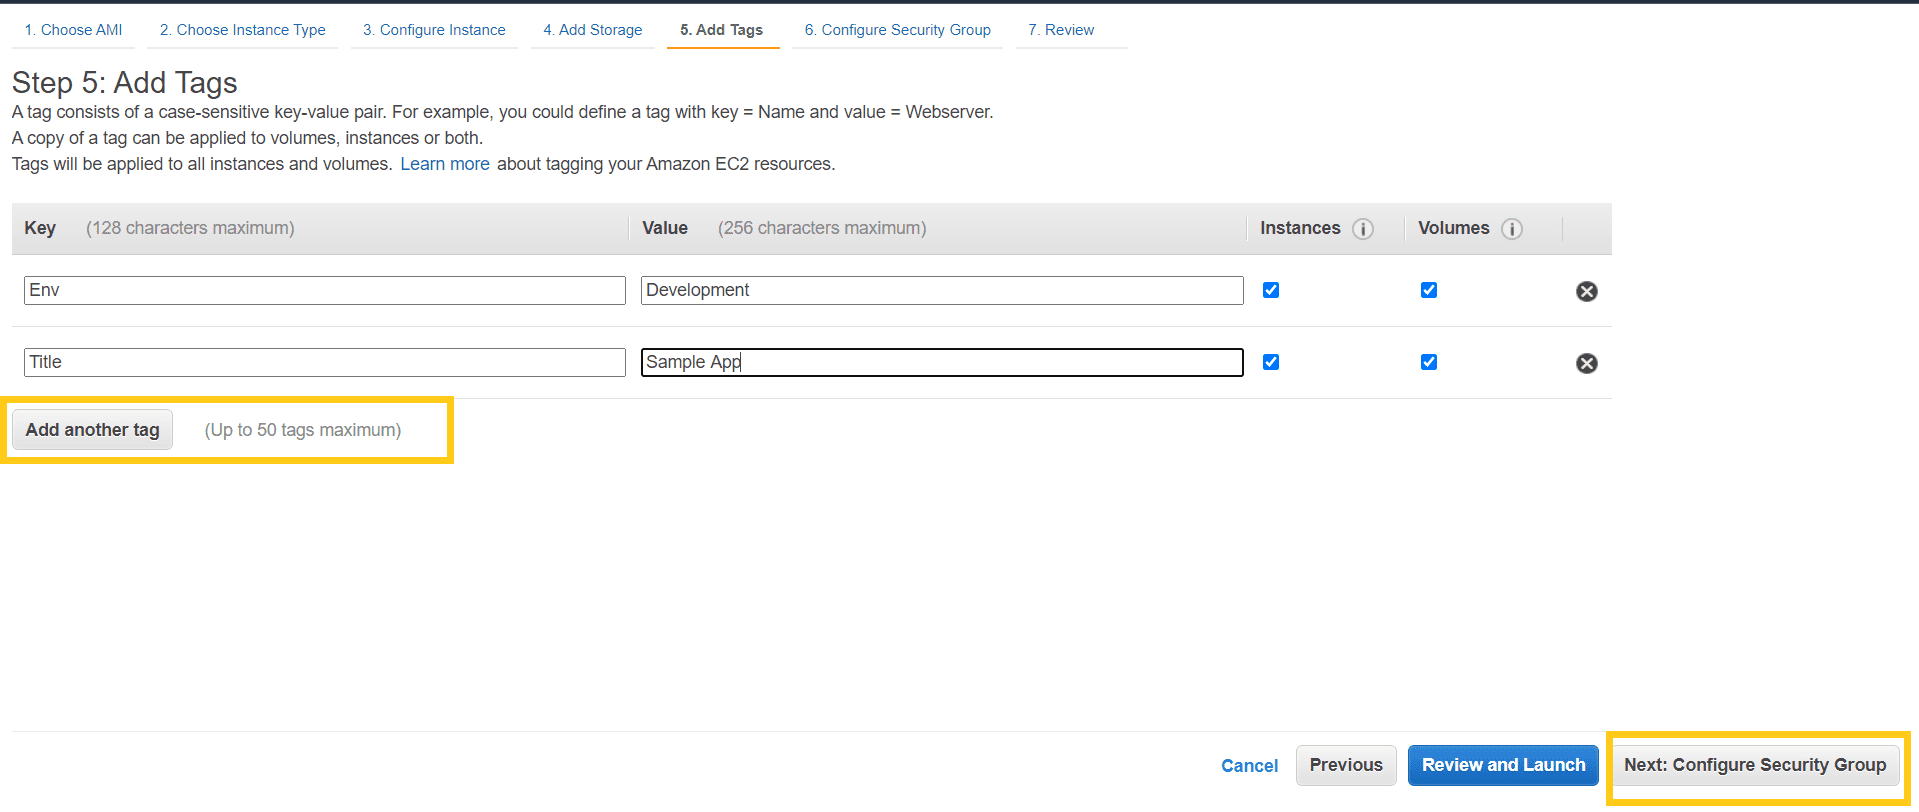
On the next screen, we can add tags to our instance and storage; these tags are key-value pairs which are very useful to add properties to our resources, especially when we have multiple instances.
We can define the firewall rules in a security group attached to our instance. With the help of these rules, we can control the traffic to our instance.
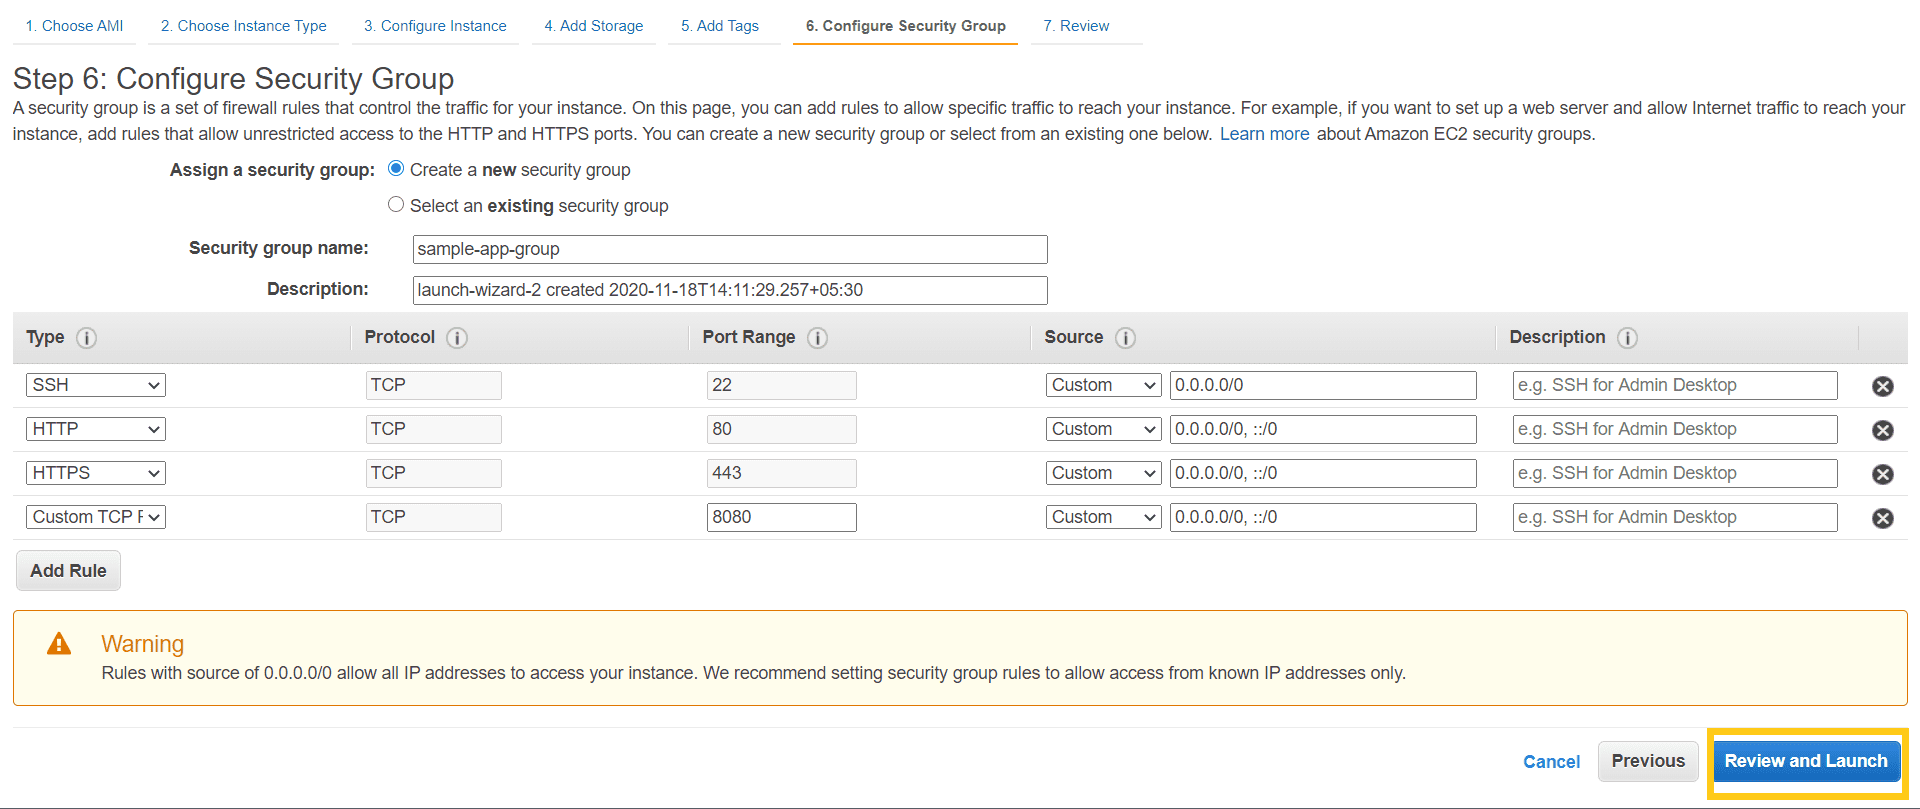
Once we are done with firewall rules, we can review the complete detail of our new instance on a single page, and here we can click Launch the button to launch the instance.
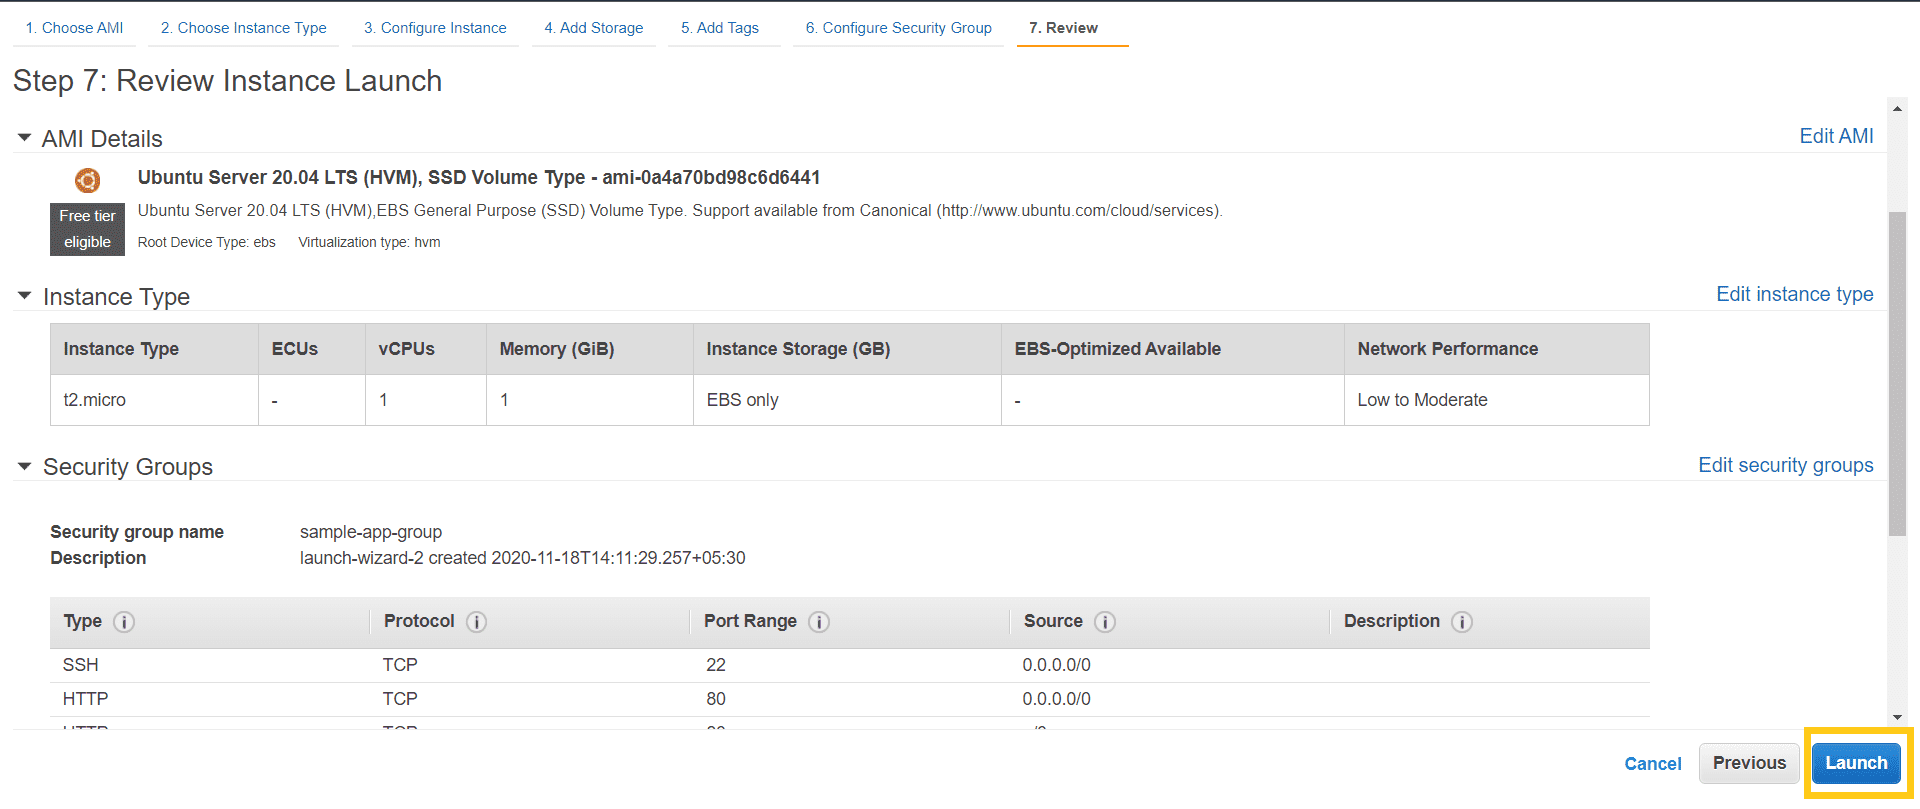
When we click Launch, it will open a pop-up that will require you to select a pre-existing public-private key pair or create one to connect to our instance securely. Once you select/download the key, you will be able to launch the instance.

It will take approximately 5-10 min to launch the instance. Once launched, You can see the list of your running instances by clicking on the Instances button on the left menu.
3.Download WordPress
To create a WordPress project
Download WordPress from wordpress.org.
Copy the download link and save it.
4.Connect to the Ubuntu terminal, above the EC2 instance.
5.Download Apache2 and MySQL
6.Configure and deploy your application
All the commands can be found here on my GitHub account
https://gist.github.com/sharayusj/42f191a436c49559591bee4b47ce9f76
7.Login to your WordPress account
Enter your Email
Enter your password